
What Fire Protection Products Do I Need?

What Fire Protection Products Do I Need?
If you’re upgrading a building, fitting out a commercial space, or simply trying to meet a specification, “fire protection” can feel like a shopping list with no logic. This guide fixes that.
This page is written for real projects: offices, schools, healthcare, retail, gyms, hotels, warehouses and plant areas.
- How Fire Protection Works (The Only Concepts You Need)
- Suspended Ceilings: What’s Fire-Rated and What’s Not
- Fire-Rated Suspended Ceiling Kits: What You Actually Buy
- Ceiling Voids: Fire Curtains, Cavity Barriers & Fire Stopping
- Drylining & Partitions: Building 30 Minute and 60 Minute Fire Rated Walls
- Penetrations: Pipes, Cables, Trunking, and Why Systems Fail
- Lighting: TP(a) Diffusers, Fire Hoods and Protecting the Ceiling
- Fire Protection Product Map (Choose by Problem)
- FAQs
- Next Steps: Get the Right System First Time
How Fire Protection Works (The Only Concepts You Need)
Before you buy anything, you need to understand one truth: fire protection is system performance. A “fire-rated” label on a single product does not automatically make your ceiling or wall fire resisting. What matters is the tested or assessed build-up (the exact combination of board, studs, insulation, fixings, joint treatment, and fire stopping details).
Fire protection products in interiors mainly exist for three jobs:
- Compartmentation: keeping fire and smoke in a defined area for a defined time (typical targets are 30 or 60 minutes, depending on building type and risk).
- Protecting concealed spaces (voids): stopping fire racing unseen above ceilings and behind linings.
- Maintaining performance at openings: lighting cut-outs, pipes, cables, ducts and movement joints are where systems typically fail.
If you’re trying to achieve a fire rating, you must build to a tested specification or a proper assessment. That means: correct board type and thickness, correct stud/track gauge and spacing, correct screw type and spacing, correct insulation, correct joint treatment, and correct fire stopping at every penetration. Deviate from the spec and you’re guessing.
If you want a deeper explanation of how fire ratings apply to ceiling systems (and what “30 minutes” actually means in real use), go here:
Read: Suspended Ceiling Fire Rating Explained →
And for broader compliance context, use:
Safety & Regulations for Ceiling Tiles →
Suspended Ceilings: What’s Fire-Rated and What’s Not
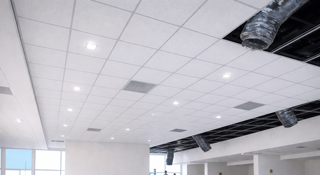
A suspended ceiling is usually a grid + tile system installed below the structural soffit. It’s common in commercial spaces because it’s fast to fit, hides services, and gives instant access for maintenance. But when fire performance is required, you need to be precise about what you’re asking the ceiling to do.
1) Fire performance in ceilings: two different questions
- Is the ceiling itself a fire resisting barrier? (e.g., a rated ceiling as part of compartmentation.)
- Is the ceiling acting as a protective membrane? (e.g., protecting something above it, or limiting spread in a void.)
Many non-rated suspended ceilings are perfectly fine for general fit-out. The moment your project includes a fire requirement (escape routes, separation, plant rooms, high risk areas, or a spec calling for 30/60 minutes), you should stop guessing and choose a fire-rated suspended ceiling kit that is designed for that job.
Use our Ceiling System Selector to match your environment (office, education, healthcare, etc.) and performance needs (fire / acoustic) to the right products.
Use the Ceiling System Selector →2) What makes a suspended ceiling “fire-rated”?
A fire-rated suspended ceiling is not just “a better tile”. It’s the whole assembly: grid type, suspension method, perimeter detailing, and the tile itself (including thickness, density and edge detail). Manufacturers test or assess systems to specific standards and classify performance based on defined criteria.
That’s why fire-rated kits matter: they keep you inside a known, repeatable build-up instead of mixing parts and hoping.
In practical terms, a fire-rated ceiling kit usually includes:
- Fire-rated ceiling tiles (chosen for the rating and the application).
- Ceiling grid system compatible with the fire-rated build-up.
- Perimeter trim and correct perimeter detailing.
- Hangers / suspension and specified fixing methods.
- Optional void protection products (when the void needs to be subdivided or protected).
If you’re still unsure whether you need a rated ceiling at all (or you suspect the requirement is actually about the void), read this first:
Suspended Ceiling Fire Rating Explained →
Fire-Rated Suspended Ceiling Kits: What You Actually Buy
If your goal is compliance without drama, buying a complete kit is usually the cleanest route. A kit reduces the chance of incompatible components (the most common reason a ceiling “looks right” but performs wrong). We supply fire-rated suspended ceiling kits that are designed to hit the spec and install efficiently.
Shop complete fire-rated suspended ceiling kits with compatible tiles + grid. This is the fastest way to buy the correct system without piecing parts together.
View Suspended Ceiling Kits →
What to confirm before you buy a fire-rated ceiling kit
A spec that says “30 minute ceiling” is not enough on its own. You should confirm the following before selecting products:
- What is being protected? A corridor escape route, a compartment boundary, a service zone, or a risk area?
- Is the requirement about the ceiling membrane, the void, or both? These are different design problems with different solutions.
- What is the structural soffit? Concrete, timber, steel, composite deck — it can affect fixings and detailing.
- Do you have penetrations? Lights, diffusers, speakers, sprinklers, access hatches, ducts, and trunking must be detailed to maintain performance.
- Do you need access? If ongoing access is needed, choose systems that can accommodate access panels without wrecking the rating.
When you have penetrations, your ceiling becomes a “products + details” job, not just a tile choice. That’s why this guide links ceilings, void barriers, drylining, and lighting together — they fail together in real buildings.
Ceiling Voids: Fire Curtains, Cavity Barriers & Fire Stopping
The ceiling void (the hidden space above a suspended ceiling) is one of the most misunderstood fire risks in fit-outs. You can install the best ceiling tiles in the world and still create a fast fire route if the void is left as one continuous, unprotected space.
When do you need fire barriers or cavity barriers in the void?
The honest answer is: when the design requires the concealed space to be subdivided or protected. This depends on the building layout, compartmentation lines, and how services run through the void. In many projects, the void must not allow fire and smoke to bypass a compartment wall (or a fire resisting line elsewhere).
This is where fire protection products like non-rigid fire barriers (fire curtains), barrier ancillaries, and fire stopping around services come in. They’re not “optional extras”; they’re what stops fire moving unseen across large areas.
A suspended ceiling can hide services, but it can also hide fire and smoke spread. If the void is continuous and crosses compartment lines, you may need fire barrier systems to maintain separation. This is exactly why void protection must be considered alongside the ceiling selection.
The four void protection “tools” used on real projects
A) Non-rigid fire barriers (fire curtains / fire barrier systems)
These are flexible barrier systems installed within voids to subdivide concealed spaces and help maintain compartmentation. They are commonly used above suspended ceilings where service runs, ducts, and cable trays would otherwise create a “hidden motorway” for fire.
Shop Non-Rigid Fire Barriers →
B) Fire barrier ancillaries (fixings, sealants, supports and closures)
Barriers only work if they are installed correctly. Ancillaries make the system: correct fixings, perimeter seals, overlaps, closure details and support structures. If you buy a barrier without the right ancillaries, you’re inviting on-site improvisation — which is how rated designs become “unknown”.
Get Fire Barrier Ancillaries →
C) Intumescent pillows (temporary or service-friendly sealing)
Intumescent pillows are used to close openings where services pass through, especially where you want future access (for example: cable management routes). They expand under heat to close gaps and help reduce fire and smoke spread.
D) Service penetration products (pipe collars and pipe wraps)
Plastic pipework is a classic failure point. In a fire, plastic softens and melts, leaving a hole that can dump fire and smoke into the next compartment. That’s why you’ll see pipe collars and pipe wraps specified in fire resisting walls, floors, and ceiling systems.
Buy Fire Pipe Collars → | Buy Intumescent Pipe Wraps →
All passive fire products (barriers, ancillaries, collars, wraps and more) are grouped here:
Shop Fire Protection Products →
Drylining & Partitions: Building 30 Minute and 60 Minute Fire Rated Walls
Drylining and stud partitions are everywhere in modern buildings because they’re fast, flexible and easy to run services through. They also play a huge role in fire strategy: partitions can form compartment walls, protected corridors, riser enclosures, plant room walls, and subdivisions within larger spaces.
If you want the long-form view on drylining (including ceilings and MF builds), read:
Drylining a Ceiling: The Complete UK Guide (2025) →
If you’re building partitions, start with the correct metalwork: studs, tracks, head tracks, deflection details, and compatible fixings. The frame is what your fire-rated board build-up relies on.
View Drylining Stud & Track →How a fire rated partition actually works
Fire rated partitions work by resisting fire spread for a defined time. In non-loadbearing internal partitions, performance is typically achieved using: a steel stud frame, fire rated plasterboard layers, correct jointing and edge sealing, and (when required) insulation within the cavity.
In practice, most partition specifications fall into two common buckets: 30 minute and 60 minute. The difference is not “slightly better board” — it’s usually a combination of layer count, board type, detailing, and sometimes insulation and stud gauge.
30 minute fire rated partition: what’s typically involved
A typical 30 minute partition build aims to deliver reliable performance without excessive thickness. What you normally see in tested builds:
- Metal stud frame at the specified centres (commonly 600mm, but always follow the tested system).
- Fire resisting plasterboard (board choice depends on the system manufacturer).
- Correct screw type and spacing (wrong spacing is a common on-site failure).
- Perimeter sealing at head, base and abutments using compatible sealants / tapes per system.
- Service penetration detailing (collars, wraps, or tested sealing methods where required).
What matters: if your partition is part of a protected route or compartment line, don’t “value engineer” the details. Most real-world failures happen at junctions and penetrations, not in the middle of a board.
60 minute fire rated partition: what changes (and why it costs more)
A 60 minute partition generally requires increased robustness. Typical changes you’ll see across tested systems:
- Additional board layers (often double layer each side, depending on the tested build).
- Heavier duty board types or higher density boards within the manufacturer’s range.
- More fixings / tighter screw centres and stricter edge distance requirements.
- Insulation within the cavity where required by the build-up (also improves acoustics as a bonus).
- Stricter perimeter and junction detailing to avoid gaps and movement cracking.
If you need 60 minutes, the wall becomes a system build, not a basic stud wall with “better boards”. The moment you add services (pipes, cables, sockets, trunking), you must protect those penetrations properly or the rating becomes meaningless.
Penetrations: Pipes, Cables, Trunking, and Why Systems Fail
Penetrations are where good projects turn into bad ones. Every opening in a fire resisting element is an opportunity for fire and smoke to bypass the barrier. That includes: pipework, cabling, cable trays, trunking, ductwork, access panels, lighting cut-outs, speakers, data points and even poorly detailed movement joints.
The “three questions” method (quick and accurate)
- What is the barrier? A fire rated partition, a fire rated ceiling, a soffit, or a compartment wall?
- What penetrates it? Plastic pipe, steel pipe, cable bundle, tray, trunking, duct?
- Is access needed later? Permanent seal or service-friendly solution?
Your answers tell you the product family you need:
- Plastic pipe through fire resisting wall/ceiling: use a tested intumescent solution (collar or wrap) sized to the pipe and installation type.
- Mixed cables or cable management openings that may change: consider intumescent pillows where appropriate, because you can rework later without rebuilding the wall.
- Large concealed void subdivisions: non-rigid fire barriers with correct ancillaries.
Stops melted plastic pipes leaving open holes. Choose by pipe size and installation detail.
Buy Pipe Collars →Ideal where collars can’t be fitted or where wraps are specified for certain details.
Buy Pipe Wraps →Service-friendly sealing for openings that need future access and change.
Buy Pillows →Subdivide ceiling voids to reduce hidden fire and smoke spread across compartments.
Shop Fire Barriers →If you want a clean, simple shopping route, start at the parent category:
Lighting: TP(a) Diffusers, Fire Hoods and Protecting the Ceiling
Lighting is one of the fastest ways to accidentally destroy a fire strategy. Why? Because ceilings and partitions are often designed as fire resisting elements — and lighting introduces holes.
If the ceiling (or the void above it) is part of compartmentation, every cut-out matters. Fire safety around lighting is not about “adding a hood later” — it’s about understanding what role the ceiling is playing in the fire strategy.
Browse LED panels, downlights, and ceiling lighting components — and choose the correct fire safety accessories where required.
View Ceiling Lighting →TP(a) rated diffusers (what it is and when it matters)
TP(a) / TP(b) ratings relate to the fire performance of the diffuser material used in certain luminaires when forming part of a ceiling. In practical terms: it’s about restricting fire spread across the surface of a ceiling lining in non-domestic buildings.
If you’re specifying LED panels in a commercial environment, TP(a) is often the safer choice because it avoids the spacing and quantity restrictions typically associated with TP(b) products.
Why Does the TP Rating of My LED Panel Matter? →
Fire hoods: what they do (and what they don’t)
A fire hood is a fire resisting enclosure installed above a downlight or fitting to help maintain the integrity of a fire resisting ceiling and reduce the risk of fire and smoke passing through the cut-out.
Think of it as restoring the “barrier” where you had to create a hole for the light. What it does not do is magically turn a non-rated ceiling into a rated one.
Fire hoods are commonly used when:
- The ceiling is required to provide a defined fire resistance period.
- You’re fitting recessed downlights into fire-rated plasterboard ceilings.
- You want to reduce fire spread and maintain compartmentation at the light opening.
- You want additional protection around transformers/drivers and wiring in the void (as specified).
We’ve written a simple, practical guide here:
Fire Hoods: A Simpler Way to Fire Safety →
- Confirm whether the ceiling or partition has a fire rating requirement (30 / 60 minutes).
- Choose lighting that suits the environment (commercial vs domestic, panel vs downlight).
- Where openings compromise the barrier, use a tested solution (fire hood or fire-rated luminaire).
- Ensure drivers, cables and transformers are routed and protected correctly within the void.
Fire Protection Product Map (Choose by Problem)
Use this section as a quick “buying map”. Find your problem, match it to the product category, then build to the correct specification.
If you want to browse all categories first, start here: Fire Protection →
| Problem | What you usually need | Go to |
|---|---|---|
| Void above suspended ceiling crosses compartment lines | Non-rigid fire barriers with correct ancillaries |
Firefly Non-Rigid Fire Barriers →
Firefly Fire Barrier Ancillaries → |
| Plastic pipe penetrates a fire resisting wall or ceiling | Fire collars or intumescent wraps sized to pipe |
Fire Protection Pipe Collars →
Intumescent Pipe Wraps → |
| Service opening needs future access (cables likely to change) | Intumescent pillows (where appropriate) | Intumescent Pillows → |
| Ceiling must meet fire performance and environment spec | Fire-rated suspended ceiling kits or selector tool |
Suspended Ceiling Kit →
Ceiling System Selector → |
| Partition required at 30 or 60 minutes fire resistance | Stud & track system with tested board build-up | Dry Lining Stud and Track → |
| Lighting penetrations in a fire-rated ceiling | TP(a) diffuser selection plus fire hood where required |
TP rating guide →
Fire hoods guide → Ceiling Lighting → |
For ceiling void subdivision and concealed space protection.
Open Category →Correct fixings and detailing to make barrier systems work.
Open Category →For plastic pipe penetrations through walls, ceilings and floors.
Open Category →Alternative or specified solutions for pipe penetration detailing.
Open Category →Everything in one place. If you’re unsure, start here.
Open /fire-protection →